How to Prepare for Your First Scar Removal Laser Treatment Session
Scars, whether from acne, surgery, injury, or burns, can leave a lasting impact on your skin and confidence. Fortunately, modern dermatology provides advanced solutions, and scar removal laser is among the most effective. This procedure not only improves the appearance of scars but also stimulates natural collagen production, giving the skin a smoother, rejuvenated look.
However, the success of laser scar removal treatment depends on proper preparation, understanding the procedure, and following post-treatment care instructions. This guide will walk you through everything you need to know to prepare for your first session, maximize results, and minimize side effects.
Understanding Scar Removal Laser Treatment
Scar removal laser treatment uses concentrated light energy to target damaged skin tissue. Unlike topical creams or chemical peels, laser treatments penetrate deeper layers of the skin to remodel scar tissue and promote new skin growth.
There are several types of lasers used for scar removal, including:
- Fractional CO₂ Laser: Ideal for deep acne scars, surgical scars, and severe skin imperfections. Fractional laser creates tiny columns of treated tissue surrounded by healthy skin, which accelerates healing and stimulates collagen regeneration.
- Erbium Laser: A gentler option for mild scarring and fine lines. It resurfaces the skin while minimizing downtime.
- Pulsed Dye Laser or Nd:YAG Laser: Often used for red, raised, or vascular scars to reduce redness and improve texture.
Your dermatologist will evaluate your scars, skin type, and overall health to determine the most suitable laser skin resurfacing method.
Step 1: Schedule a Consultation
The first step to a successful laser scar removal session is a consultation with a qualified dermatologist or cosmetic laser specialist. During this visit, the doctor will:
- Assess the type, age, and severity of your scars.
- Review your medical history, including medications, skin conditions, and previous treatments.
- Discuss realistic outcomes and the number of sessions required.
- Recommend the most appropriate laser type and treatment plan.
A consultation is essential to ensure that the treatment is safe, effective, and tailored to your unique skin needs.
Step 2: Prepare Your Skin
Proper skin preparation can reduce side effects and enhance results from your laser scar removal session:
- Avoid Sun Exposure: Sunburned or tanned skin increases the risk of pigmentation changes after laser treatment. Apply broad-spectrum sunscreen daily and avoid tanning beds for at least 2–4 weeks before the procedure.
- Pause Certain Medications: Blood thinners, retinoids, or medications that increase photosensitivity may need to be temporarily discontinued. Always consult your dermatologist before stopping any prescription.
- Keep Skin Clean and Hydrated: Wash the treatment area gently and avoid makeup, heavy creams, or perfumes on the day of your session. Well-hydrated skin responds better to laser treatments.
- Avoid Other Skin Treatments: Chemical peels, microdermabrasion, or waxing should be avoided at least 1–2 weeks before your laser session.
Step 3: Understand the Procedure
Knowing what to expect during your scar removal laser treatment can help ease anxiety and make the process smoother:
- Duration: Most sessions last 30–60 minutes, depending on the size and number of scars.
- Numbing: Topical numbing cream is applied to reduce discomfort. Some patients feel a mild snapping or tingling sensation during the treatment.
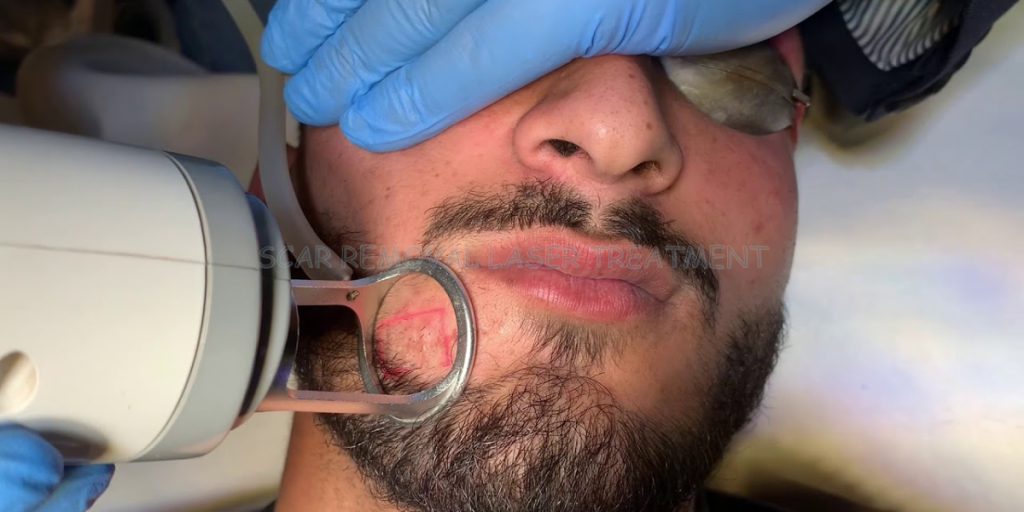
- Laser Application: The dermatologist moves the laser device over the scarred area in a controlled pattern. Fractional lasers create micro-columns of treated tissue while leaving surrounding skin intact to speed healing.
- Pain Management: Most patients describe mild discomfort, which is temporary and manageable. In some cases, local anesthesia or cooling devices are used for more sensitive areas.
Step 4: Plan for Downtime and Recovery
Laser scar removal involves controlled injury to the skin to stimulate healing, so downtime is expected:
- Redness and Swelling: Common in the first 2–5 days. It may feel like a mild sunburn.
- Peeling and Flaking: Treated skin may peel as new skin regenerates.
- Avoid Sun Exposure: The skin is more sensitive post-treatment, so sun protection is critical.
- Healing Time: Most patients resume normal daily activities within a week. More aggressive treatments like CO₂ fractional laser may require longer recovery.
Step 5: Post-Treatment Care
Post-treatment care is crucial to prevent complications and maximize results from laser scar removal:
- Moisturize: Use gentle, fragrance-free creams recommended by your dermatologist to keep the skin hydrated.
- Avoid Picking or Scratching: Prevents infection and additional scarring.
- Follow-Up Sessions: Deep scars may require multiple sessions (typically 3–5) spaced 4–6 weeks apart.
- Sun Protection: Always use broad-spectrum sunscreen to prevent hyperpigmentation.
- Gentle Cleansing: Avoid harsh exfoliants, retinoids, or chemical peels for at least 2 weeks after treatment.
Step 6: Manage Expectations
While laser scar removal significantly improves scar appearance, it may not completely eliminate all scars. Results depend on:
- Scar type (ice pick, boxcar, hypertrophic, keloid)
- Scar age and size
- Skin type and sensitivity
- Number of sessions completed
- Adherence to post-treatment care
Patients typically notice gradual improvement within 2–4 weeks, with continued enhancement over several months.
Tips for a Successful First Laser Session
- Wear Comfortable Clothing: Loose clothes prevent irritation if large areas are treated.
- Arrive With Clean Skin: Avoid makeup, lotions, or oils on the treatment day.
- Communicate With Your Dermatologist: Discuss pain levels and ask questions about the procedure.
- Take Before Photos: Helps track progress and results over multiple sessions.
- Follow Pre-Treatment Instructions: Reduces the risk of complications like burns, hyperpigmentation, or prolonged redness.
Final Thoughts
Proper preparation is the key to a successful scar removal laser treatment session. By scheduling a consultation, preparing your skin, understanding the procedure, and following post-treatment care, you can achieve optimal results.
Laser treatments, including fractional CO₂ laser, erbium laser, and pulsed dye laser, offer safe, effective, and long-lasting improvements for acne scars, surgical scars, and other skin imperfections.
With patience, consistent aftercare, and professional guidance, you can achieve smoother, healthier-looking skin and regain confidence in your appearance.
Ready to Start Your Scar Removal Journey?
Don’t let acne scars, surgical marks, or old injuries affect your confidence. Laser scar removal treatment can help you achieve smoother, healthier-looking skin safely and effectively. Take the first step toward a clearer, more radiant complexion!
Call now or schedule your appointment online to transform your skin with expert care.